12.30.2010

Panettone Bread Pudding


Let me start this post with a disclaimer: my husband did not approve of this dessert. Now, you might be asking yourself, "Why would you include this recipe on the blog?" Valid question. It is because he is CRAZY! Of all the dinner guests over at the house, Micah was the only one not ooooing and ahhhhhing over this thing. The real problem is, that he wants me to recreate the bread pudding at Canyon Restaurant, the BEST restaurant in Fort Lauderdale. The only way that impossible task will ever happen, is if the head chef invites me over himself for a personal baking lesson. Seriously, if you live in the Fort Lauderdale region and have never eaten at Canyon's you are missing the best Prickly Pear Margarita, amazing food and hands down the best white chocolate bread pudding with Chambord berry compote.

I found this recipe while browsing through Food and Wine's website. I had always had the idea of using panettone bread, rather than traditional bread, but was convinced I would create the recipe my usual way, fusing a few recipes together. Panettone is a sweet Italian bread. Though you can find it year round, it is traditionally a bread served in Italy for Christmas and New Years. It usually contains candied fruits, such as oranges and raisins and you can find some with chocolate chips (which Micah would have probably enjoyed.) I think this would be a decadent dessert to serve at your News Years Eve party! All it needs is a scoop of good quality Vanilla Bean ice-cream and let the count down begin.

Here is a song for your enjoyment as you are reading through the recipe. I wish everyone a happy and healthy New Year! Until next time, cheers and happy eating!


Preheat the oven to 400 degrees. Butter a 2-quart baking dish. Toast 2 pounds sliced panettone bread, about 1 1/2 inches thick on the oven racks for 8 to 10 minutes, or until golden. Cut into 1 1/2-inch cubes and transfer to the prepared baking dish.

In a saucepan, cook 1 stick unsalted butter over moderately low heat until nutty and the milk solids are brown, 4 to 5 minutes. Toss the butter with the panettone.

In a medium bowl, using an electric mixer, beat 3 large eggs and 1 cup of sugar at medium speed until pale and thick, 2 minutes. Beat in 2 teaspoons of pure vanilla extract, 1 teaspoon ground cinnamon, 1/2 teaspoon of freshly grated nutmeg and a pinch of salt, then beat in 2 cups of heavy cream and one 12-ounce can of evaporate milk.

Pour the custard over the panettone; let stand for 1 hour, gently tossing now and then, until the custard is absorbed. Preheat the oven to 400 degrees. Bake the bread pudding for 25 to 30 minutes, until the top is golden and the custard is set.

Let cool for 30 minutes before cutting into squares. Serve warm, with a big scoop of vanilla ice-cream.


12.24.2010

Quick Lunch for Guests (or You!)

I whipped this up the other day, took one bite, and could not believe my taste buds. I instantly thought that this sandwich would be an impressive, and simple, lunch to make for any holiday guests lingering around the house.

The key is the bread! I used Bimini bread, a staple here in Fort Lauderdale. Though it looks like any ordinary white loaf, upon taking one bite, anyone can tell that is far from white bread. It is a yeast bread with a subtle sweet flavor and soft texture that reminds me of Challah bread. It originated in the western Bahamas and its' recipe was once kept secret; thankfully not for long. Let me tell you, Fort Lauderdale tapped into the Bimini bread market, most notably, Bimini Boartyard, a local restaurant.
.
Here is a little Christmas tune for your enjoyment! Till next time, cheers and happy eating!


Grilled Cheese with Bacon and Apple

Ingredients

two slices of thick bread
1-2 Tablespoons of butter
Miso Dijonnaise (or Dijon Mustard, Old Style preferred)
shredded cheddar cheese
Gruyere cheese
5 slices of Granny Smith Apple

3 slices of
cooked soy bacon (real bacon for all you carnivores

Heat a non-stick skillet over medium heat. Spread butter on both slices of bread. On the inside of one slice, spread Miso Dijonnaise, layer with a healthy dose of each cheese, followed by the apples and bacon. Cook sandwich on each side slowly. They key to getting this sandwich right is to take your time cooking it! It should take about 5-6 minutes on each side. You also want to press it down slightly occasionally.

12.22.2010

Chocolate Covered Cherry Cookies


Growing up in a Jewish household, I use to gaze upon Christmas activities in envy. Yes, I had Hanukkah, but the magic of Christmas always seemed to outshine the festivities of Hanukkah. The funny thing is, that the Jewish guilt I was raised by made me feel guilty for feeling this way. I really believed that it was sinful, as though the gates of hell were to crack open between my feet and gobble me up....seriously.

Now of course, I was the kid that always knew that there was no such thing as Santa Claus, but I still begged my mom every year to take me to see Santa, and so she did, the Jew and Santa. I would sit on his lap, pretend I was blissfully ignorant, and wish for my gift. I remember one night, my mom and I sneaked on over to Midnight Mass and I was overwhelmed with emotion. I walked into that church and was sure I was going straight to hell, but as soon as the choir started to sing, I was moved to tears.


Fast forward 20 years, and I hit gold! Sure, I married my soul-mate, the love of my life, but he also happens to celebrate Christmas. The Jewish guilt has subsided and I now approach the holiday season with ardent fervor. As our family grew, we created our own family traditions; celebrating both holidays and oftentimes, infusing one into the other. The meaning of Christmas, or Hanukkah for that matter, have no religious connotations, to me, but evoke a time of strong familial bonding. I love that come Christmas morning, the whole world seems to shut down. There are no e-mail alerts buzzing from my phone, no phone calls being made, no store to rush to, just straight-up family time. Joy to the world indeed!

Much of these traditions are driven by food! I mean, it is the holidays after all! As I mentioned in the webisode, one bite of these cookies, no matter what time of year it is, instantly transports me to jingle bells and tinsel. I am very excited to share them with you and I hope that you enjoy them every bit as I do. Just a few pointers before we get to the recipe:

- This recipe has been doubled, so it does produce a large quantity. However,
since these cookies are a bit arduous, it is worth making a big batch.
- Don't expect your typical chocolate chip cookie dough. This dough will
be thick.
- It helps to dampen your hands when you are forming the balls. This keeps the
dough from sticking.
- When making the chocolate sauce, make sure to stir constantly!

And now, to the recipe. Here is wishing you and your family a very merry Christmas, whatever your family traditions might be, may your time spent together be meaningful and joyful. Until next time, cheers and happy eating!


Chocolate Covered Cherry Cookies
Makes 28 cookies

1 Cup butter, room temperature
2 Cups sugar
3 teaspoons vanilla
2 eggs
3 Cups of flour
1 Cup cocoa
1/2 teaspoon salt
1/2 teaspoon baking powder
1/2 teaspoon baking soda
1 10oz. jar maraschino cherries, drained, juice reserved
1/2 cup sweetened condensed milk
1-1 1/2 teaspoon reserved cherry juice

Combine the first four ingredients. Mix until smooth. Add the flour, cocoa, salt, baking powder and baking soda and mix. Dough will be stiff.

Drain the cherries, reserve juice, and pat dry.

Make one-inch round balls with the dough and place on a greased cookie sheet. Pat a cherry into each ball.

On low heat, pour condensed milk and stir in the chocolate chips. Stir often until chocolate chips melt. Add cherry juice as necessary.

Cover each cherry completely with the frosting.

Bake in a 350 degree pre-heated oven for 8-10 minutes, being extra cautious to not over bake.

12.20.2010

Simple Pleasure


I am always astounded when a few simple ingredients come together so well that they make a dish taste profound. This is certainly the case for this simple snack. I actually first made this dish the day I gave birth to my daughter. I was home from the birthing center no more than a few hours when my mom brought me an eclectic variety of ingredients from the grocery store. I wanted something creamy and savory, but did not have the energy to stand in the kitchen and cook. While Micah had some daddy time, I quickly made this using the items my mom bought and have made it ever since.


And of course, some tunes for your enjoyment! Harlem Shakes: Winter Waters. Cheers and happy eating!


Recipe

-slice of whole grain bread

-half an avocado, sliced
-Gruyere or Asiago cheese, sliced or grated
-juice of half a lime
-salt
-pepper

Layer slice of bread with layer of cheese, slightly toast in a toaster oven. Once it is half-toasted, layer with avocado slices and toast some more. Once toasted, squeeze lime juice and sprinkle with salt and pepper.


12.13.2010

Vegetarian Chili (with carnivorous option!)

No video today folks. It has been a while, I know, but life catches up to us all. I am approaching a nice two week long holiday and plan on backlogging some webisodes, so fret not my faithful readers! For now, I would like to share with you the all-time best chili I have ever eaten! I am not sure if you can really call this a chili. It's actually more of a hybrid between a chili and a hearty stew. It's the perfect winter meal to warm the body and satiate the night-time appetite.


This dish blends together the perfect amount of vegetables, beans and spices into a blissful stew that will feed you for days. My husband and I banged it out in the kitchen together sipping a Cabernet and listening to cheesy Christmas music (its that time of year.) Micah decided to boil some chicken breasts in chicken stock to add to his bowl. I reminded him how he basically became a vegan when we first started dating, but it is now clear that it was all part of his courting strategy. It worked. Regardless, he said the chicken was the perfect accompaniment.

Things to know about this dish:
- The vegetables release a lot of liquid which makes up for the recipe
only calling for one cup of water.
- Though a departure from red beans,
the black beans are a nice touch in
this chili.
- Be prepared, this is Mexican inspired.


I couldn't leave you without a song for the week! I hope that everyone is enjoying the cold weather.


Vegetarian Chili
Inspired from Emeril Lagasse
  • 2 tablespoons canola oil
  • 3 chopped yellow onions
  • 2 chopped red bell peppers
  • 2 tablespoons minced garlic
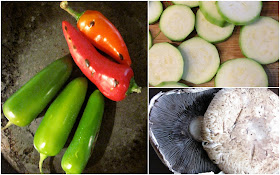
  • 2 to 3 serrano peppers, stemmed, seeded, and minced, depending upon taste
  • 1 medium zucchini, stem ends trimmed and cut into small dice
  • 2 cups frozen corn
  • 4 portobello mushrooms, stemmed, wiped clean and cubed
  • 2 tablespoons chili powder
  • 1 tablespooon ground cumin
  • 1 tabelspoon paprika
  • 1 teaspoon oregano
  • 1 1/4 teaspoons salt
  • 1 teaspoon cayenne(more if you like it spicy)
  • 4 large tomatoes, peeled, seeded and chopped
  • 3 cans of black beans, rinsed and drained
  • 1 (15-ounce) can tomato sauce
  • 1 cup vegetable stock, or water
  • 1/4 cup chopped fresh cilantro leaves
  • Cooked brown rice, accompaniment, if desired
  • sour garnish
  • Diced avocado, garnish
  • Chopped green onions, garnish

Directions

In a large, heavy pot, heat the oil over medium-high heat. Add the onions, bell peppers, garlic, and serrano peppers, and cook, stirring, until soft, about 3 minutes. Add the zucchini, corn, and mushrooms, and cook, stirring, until soft and the vegetables give off their liquid and start to brown around the edges, about 6 minutes. Add the chili powder, cumin, paprika, oregano, salt and cayenne, and cook, stirring, until fragrant, about 30 seconds. Add the tomatoes and stir well. Add the beans, tomato sauce, and vegetable stock, stir well, and bring to a boil. Reduce the heat to medium-low and simmer, stirring occasionally, for about 20 minutes.

Remove from the heat and stir in the cilantro. Adjust the seasoning, to taste.

To serve, place 1/4 cup of brown rice in the bottom of each bowl. Ladle the chili into the bowls over the rice. Top each serving with a dollop of sour cream and spoonful of avocado and green onions.

11.30.2010

Broccoli with Roasted Fennel


Fennel is one of the many wonderful vegetables Americans do not incorporate into their diet enough. Though fennel is becoming more popular in the states, it has been widely consumed in Europe and Asia for centuries. Some cultures claim that fennel contains slimming properties while other use it to cure hangovers. Whatever the claim, it is damn delicious. Yes, I said damn. The only adjective that really comes to mind when I try to describe the taste of raw fennel is licorice. Now please, do not let this turn you off (though it shouldn't) from trying it, as the flavor transforms into something magical when roasted.

I came up with this combination when frankly just being bored from eating broccoli. I had been preparing roasted fennel on its own and one day decided to toss it in with some broccoli I had prepared. It has been a staple ever since.

Some tips before you start:

- Watch the fennel closely as it cooks. I have burned it many times!
- Don't over-steam the broccoli. You really just want to soften it as the
broccoli will cook in the frying pan.
- Add the garlic at the very end. Otherwise, it will burn.
- Experiment! Don't just limit yourself to broccoli. Fennel would make a great
accompaniment to a plethora of vegetables.


Broccoli with Roasted Fennel and Onions

1 fennel bulb
1/2 sweet onion, sliced
1 broccoli head, cleaned
2 garlic cloves, minced
olive oil
salt
pepper
red pepper

Remove the stem and bottom of the fennel. Cut fennel in half and remove the bulb at the very bottom. Slice in thin strips. Toss sliced fennel and sliced onion on a pre-lined baking sheet with olive oil, salt and pepper. Roast in a 425 degree pre-heated onion for 40-45 minutes, stirring occasionally.

Meanwhile, steam broccoli in boiling water for 6-8 minutes. Be careful not to overcook, as the broccoli will continue to cook when sauteed. Strain broccoli and saute in olive oil for 3-5 minutes. Add salt, pepper and 1 tablespoon of red pepper flakes. Add the roasted fennel and onion


11.22.2010

Rosemary Roasted Potatoes


The holidays are here and I really want to do something different this year. Now, I fully realize that some people are strongly devoted to the traditions of the holidays, so rest assured that I am by no means trying to revolutionize the festivities. My husband usually whips up some divine mashed potatoes, but I thought that roasting them this year would be just enough pizazz without offending anyone.

The best part about this recipe is that it is way easier to prepare than mashed potatoes and the crisp factor, I feel, will compliment any turkey. To me, it seems that all the sides at the Thanksgiving (or Christmas) table just meld together into one big mush. Seriously, between the consistency of the mashed potatoes, the sweet potatoes and the green beans you can't tell one from the other.


A few tips before you begin:
  • Don't use baking potatoes, rather, opt for Yukon Gold potatoes. They have a waxy exterior and taste creamier.
  • You don't want to slice the potatoes too thin. This will cause them to crisp up like a french fry and we aren't looking for that type of consistency.
  • Try to slice the onions the same width as the potatoes to ensure they cook evenly.
  • Skip chopping the rosemary. Simply tear it off the stem.
  • Once in the oven, make sure to stir every 15 minutes.
  • The cooking time certainly varies so keep an eye on these. We are looking for a slightly crispy outside, and a nice soft interior.

I think these babies will be a new tradition out our holiday table. I hope you enjoy them as much as I do. Until next time, cheers and happy eating!

Rosemary Roasted Potatoes

5-7 Yukon Gold potatoes, sliced somewhat thin
1 sweet onion, sliced
4 garlic cloves, minced
3 sprigs of rosemary, torn off the stem
about a 1/4 cup of olive oil
salt
pepper

In a buttered baking dish, combine all ingredients. Bake in a 425 degree heated oven for approximately 50 minutes. Stir every 15 minutes.

11.20.2010

Change of heart

I have always been attracted to white cabinetry in a kitchen, but as of late, I have had a change of heart. We are talking a complete 180 degree change of heart to...black. Black?! I know. I can hardly believe it. I have, for as long as I can remember, known exactly what my dream kitchen would look like. White cabinets, dark counters, open shelving and some glass-front cabinets. Here are some samples of what I had in mind:

Coastal Living

This hits all my "white kitchen" requirements and then some. I especially love the hanging light fixtures and exposed beams. I am partial to drawer pulls, but I could let that slide.


Ikea

I do like butcher block and I love the exposed shelving. Not sure how I feel about the transition from back splash to wall though.

Jenna Lyons Kitchen

J. Crew's creative designers kitchen makes me question my kitchen aesthetic.

Gwyneth Paltrow, Hamptons Kitchen

This is the kitchen that turned my kitchen world upside down. Gwyneth Paltrow's kitchen in her Hampton home is a dream. The gray graphite cabinets, the white sky-high walls and white chandelier are sheer perfection. I think what appealed to me most about this kitchen was, that despite the dark cabinetry, it feels so airy and bright.

Nathan Edge White

This leads me to consider that maybe there is a happy medium, as seen in this white meets black kitchen. White cabinets, black island, shiny carrara marble counter tops and to top it all off, glossy espresso wood floors.


11.16.2010

Guest Post: Odi et Amo

Photobucket

Taking a departure from the food world, and guest posting some mommy advise over at the ever so chic blog Odi et Amo. Enjoy the post, and then spend some time browsing the decor eye candy Averill provides. Cheers and Happy eating!

11.12.2010

Chickpea Salad


I should preface this post with the fact that I an utterly obsessed with chickpeas. I could eat them out of the can. (I actually have, terrible, I know.) I wish more than anything I could take credit for coming up with this simple, yet delicious, chickpea concoction. It really is a testament to how a few ingredients can pack a flavorful punch.


This recipe is brought to you by one of my favorite food blogs, 101 Cookbooks. Hiedi's recipes, photos, and stories make me want to run to the farmers market and frolic as I pick my produce. She has a unique view on ingredient combination, influenced from the middle and far east (think tahini, curry, and sesame) which has taught me a lot in the kitchen.

Leeks aren't used too often in American kitchens. They are pretty much an enlarged, milder version of a green onion. What balances the mildness is the bite from the red onion. For the yogurt sauce, I highly suggest Greek yogurt. Its creamier than traditional yogurt, while still being low in fat. I hope you all enjoy this as much as I did.

Cheers & happy eating!


Pan-fried Chickpea Salad
Adapted from 101 Cookbooks

1 tablespoon clarified butter, olive oil, or coconut oil
2 cups cooked chickpeas (garbanzo beans), pat them completely dry with clean dish towel
1 cup of chopped leeks
1 medium clove of garlic, minced
zest of one lemon
1/3 cup plain yogurt (I typically use low-fat Greek)
1 1/2 teaspoons Indian-style curry powder (or to taste)
scant 1/4 teaspoon fine grain sea salt
1 or 2 tablespoons warm water
1/2 cup of loosely packed fresh cilantro, chopped
1/2 cup red onion or red spring onions, chopped

1/3 cup of toasted slivered almond, chopped


Heat the cooking oil in a large skillet and add the chickpeas. Saute over medium-high heat, stirring occasionally, until they start getting a bit golden in color. Stir in the leeks and cook until the chickpeas are more golden and the leeks have browned a bit as well, roughly 7 - 10 minutes total. At the last minute stir in the garlic and the lemon zest. Remove from heat, and set aside.


While the chickpeas cool (I like to serve this salad at room temperature), make the yogurt dressing by combining the yogurt, curry powder, and salt in a small bowl. If you need to thin it out a bit, particularly if you are using Greek yogurt, whisk in warm water a tablespoon at a time. Taste, adjust, and set aside.


When you are ready to serve the salad, toss the chickpea mixture with most of the cilantro and most of the chopped red onion. Add about 1/2 of the yogurt dressing and toss again. If you like more dressing, keep adding until you are pleased. Serve on a platter sprinkled with the remaining onions and cilantro.

11.07.2010

Sky High Pancakes


Haiku for Pancakes
Fluffy and yummy
Childhood memories in mind
Each bite a delight

Seriously, what is there not to like about perfectly fluffy pancakes topped with an ooze of maple syrup? Now, the crucial word here is FLUFFY. I have had disastrous experiences with pancakes, and it is not an understatement for me to say that it has taken years for me to find the perfect combination of flour, sugar, and baking powder to pull off these fluffy babies.

Big tips to keep in mind:
-Sift! I use to think sifting was just an unnecessary step, but it is crucial to getting the right consistency.
-Don't over-mix. Mixing too much will cause the pancakes to be rubbery rather than fluffy.
-Make sure to use a non-stick pan that is hot! I usually put it on the stove while I am preparing the batter.
-Once I am done mixing, I like to pour the batter into a measuring cup for easy pouring.


Before we get to the recipe, I wanted to leave you with a song to listen to as you read it. This song is my new obsession, and I hope to play it on the guitar some day soon. Till next time, cheers and happy eating!


Perfectly, Fluffy, Pancakes

3/4 cup of all-purpose flour
3/4 cup of whole wheat flour
1 teaspoon baking powder
2 tablespoons white sugar
1 1/4 cups milk (might need to add more if the batter is dense)
1 egg
4 tablespoons butter, melted

In a large bowl, sift together the flour, baking powder, salt and sugar. Make a well in the middle and pour in the milk, egg and melted butter; mix until you reach a smooth consistency. Be careful to avoid over-mixing.

Heat a non-stick frying pan over medium heat. Pour or scoop batter onto the pan. Brown on both sides and serve.

10.30.2010

Recipe Boxes


I am looking for a new way to organize my recipes. Since starting this blog, I have accumulated tons of new recipes that I am planning on experimenting with. Currently, they are stored in an old binder. I do have them in sheet protectors but its a pain in the butt to flip through to find what I am looking for. Sure I can get dividers, but I am seriously loving the idea of a recipe box. Here are a few that really caught my eye.


I am a hooker for anything letterpress! I think the cards are darling, and the fact that everything is hand-drawn by the artist make for a unique piece.


I love the fact that this is not your traditional recipe box, unfortunately it is not for sale. However, I am still super attracted to these adorable recipe cards, which were illustrated by Suzi Ultman. Again, letterpress!


These owl cards are sent as pdf files which makes it very convenient to printing them as needed (not to mention never worrying about running out of cards!) I have somewhat of an owl fetish, and I do tend to be attractive to things that are cute, rather than refined.


Ok, so I am about to contradict myself here. I know I just stated that I am not a refined kinda gal, and this acrylic recipe box is most certainly refined, but the plethora of color options really spices things up here! What isn't so attractive, is the price. I just couldn't bring myself to spend $80 on recipe storage.


This is a do-it-yourself project that combines a Martha Stewart box and hand-crafted recipe dividers made from scrapbook paper. I think the end result is a vintage-looking box that feels like a family heirloom.


Now, I could scrap the whole recipe box idea and go for something techy. This digital recipe box is sleek, compact, and kitchen-safe. It's like the Cookbook version of a Kindle. I also like the fact that I can choose to keep my recipes private of share them with whomever I choose.

So what do you all think? How do you store your favorite recipes? I would love to hear from you! Until next time, cheers, and happy eating!

10.22.2010

Israeli Salad


You may have noticed that this salad does not have a trace of lettuce in it. Honestly, the only salad you will find in Israel with lettuce in it is a Caesar salad. That is not to say that Israel is short of delicious and unique salads. They are quite proud of their salads! There are veggie salads, pickled salads, bean salads, corn salads, and just about anything else you can imagine. A visit to any restaurant includes an entire course of salads, not to mention the most fluffy and warm pita, served on the table before you even order. The colors pop, the taste buds are tantalized, and the hunger is always satiated!


In order to make this authentically Israeli, you must dice the veggies up finely! As a child, I remember my cousin and my brother would have contests to see who could make their salads with the finest chopped vegetables. It pretty much boils down to this simple ration: equal parts tomato and cucumber to one-third red onion. I hope you enjoy this as much as I do!

Israeli Salad

3 roma tomatoes, finely diced
1 large cucumber, finely diced
1/3 of a large red onion, finely diced
1 lemon
1/4-1/3 cup olive oil
salt
pepper

Combine, eat, enjoy!

10.12.2010

Jungle Love

The images from Ikea's new cookbook really left an impression on me. They are so artful and geometric that I had to find out who was responsible for them. His name is Carl Kleiner, a photographer who hails from Stockholm. Looking through his photographs (most that are not food related) it is obvious that he gravitates towards abstract photos that are minimally styled, yet still manage to make an impact. Of course I had to share his food related photos.


It is hard to pick a favorite, but I am gravitating towards the eggplant zebra. The squash puppy is pretty impressive too. How about you? Which is appeals to you most?

10.08.2010

Ikea Food Porn

Leave it to Ikea to publish a cookbook filled with a crazy cool arrangement of ingredients. I can't vouch for the quality of the recipes, but I could blow these photos up and hang them as artwork!


What do you all think? Pretty cool, no?
I am feeling super inspired to try my own version! Maybe next webisode....


10.06.2010

Eggplant Parmesan Done Right


I am not sure what to be more excited about, the new band featured in this week's webisode, or how utterly delicious this Eggplant Parmesan is. In case you haven't already noticed, music is just as important to me as food. Listening to a great new song and eating a delectable dish evoke the same feelings in me. So I hope you all enjoy the tunes as much as you enjoy the food!

I have to give a shout out to my friend Ellen for teaching me how simple this dish is to make. Ellen had made it for my husband and me one night. It was so yummy, but of course we had leftovers. The following night, I had invited some guests over for a dinner party. I set this out in case anyone wanted to try it and it disappeared faster than any other dish.

Just a few tips. The success of this meal heavily depends on the quality of the ingredients. Because we aren't making a tomato sauce from scratch, I can't stress how important it is that you purchase really good quality sauce. The same goes for the cheese. After the eggplant, the cheese is the star ingredient.


I hope you all enjoy this. Please leave me a comment and let me know what you think! Cheers and happy eating!

Eggplant Parmesan

2 medium size eggplants (cut into 1/2-inch rounds)
all-purpose flour, for dredging
2-4 eggs, beaten with 2-3 Tablespoons of water
Italian breadcrumbs, for dredging
vegetable oil, for frying
2 jars of good quality marinara sauce
12 ounces grated mozzarella, not fresh
12 ounces grated pecorina romano
handful of basil, chopped
salt
pepper
italian seasoning

Place the flour, eggs (beaten with water), and bread crumbs in three, separate, large shallow bowls.

Season each eggplant slice on both sides with salt and pepper. Dredge each eggplant slice in the flour, shaking off the excess, then dip it into the egg, and lastly dredge it in the bread crumbs. Transfer to a baking sheet.

Heat a good amount of oil in a saute pan over medium heat. When the oil gets hot, fry a few of the eggplant slices, making sure not to crowd the pan, and turn once until golden brown. About 3 minutes per batch. Transfer to a paper towel-lined baking sheet. Continue with the rest of the eggplant.

Cover the bottom of a baking dish with some tomato sauce and arrange eggplant over the sauce covering the dish. Cover the eggplant with some more sauce, grated mozzarella,
Romano cheese, salt, pepper, Italian seasoning and basil. Repeat to make 2-3 layers (depending on baking dish and how much eggplant there is.) Lastly, top with a few pieces of butter and bake until hot and just beginning to brown, about 30-35 minutes.


9.25.2010

Flank Steak Tacos


Anytime my husband is looking to impress a friend, he whips these babies up. It never fails that customers always leave satisfied. Ask any one of our friends, they have ALL had Micah's flank steak tacos and they have all come running back for more. Micah makes these for me with shrimp, so it just goes to show you can substitute any protein you would like.

We use La Victoria taco sauce and salsa to make these, but it can be tricky to find. If you don't have luck, use whatever authentic Mexican sauces your local grocer has. Also, don't worry if you don't have a food processor! In our college days we didn't have one so we use to grate the tomatoes with a box grater. It was a great arm workout.


As I said in the webisode, there is some prep work to these and they cook for nearly 4 hours but it is well worth it. This dish is perfect for lazy Sunday.! At our house, Sunday equates to cook-day. We spend nearly half the day in the kitchen cooking up a storm. It's become somewhat of a family tradition.


Micah's Flank Steak Tacos

6 tomatoes
1 large onion
2 jalapeno peppers, finely diced (use one if you are sensitive to heat)
3-4 garlic cloves, finely diced
1 jar of La Victoria, taco sauce, hot
1 jar of La Victoria, salsa, hot
1 bunch of cilantro, chopped
1.5 pounds of flank steak
salt
pepper

Blend the tomatoes, onion, salt and pepper in a food processor until coarsely chopped. (See note at bottom.)

Pat dry the flank steak. Salt and pepper both sides. Cut steak into 2-inch cubes.

Set a large skillet to medium-high heat. Pour a generous amount of vegetable oil. Cook meat until seared (browned) on all six sides. About 2-3 minutes per side.

Add entire jar of taco sauce and stir. Add tomato and onion mixture stir. Add the salsa, stir. If sauce looks thick, fill salsa jar half way with water and add to steak sauce. Add jalapeno, garlic and cilantro. Stir.

Reduce heat to medium low. Add a generous amount of salt and pepper. Simmer for 3.5 to 4 hours until the meat breaks apart with a fork.

9.18.2010

It's Always Good for a Change


I was browsing the internet today and happen to stumble upon some kitchen items that got me all excited, and it got me thinking on making a blog post about it. It's never a bad thing to spice things up a bit (no pun intended) so I hope no one minds the departure from the usual webisodes. Who knows, maybe this will be a regular thing? No worries though, Friday will have my usual video banter, and this week I am sharing my husband's flank steak tacos recipe, something he is somewhat famous for around our circle of friends. So onto the dream list....


I have good knives, but not great knives, and boy would I love to wrap my pseudo-chef fingers around this professional baby. Honestly, I'll take any Wusthof, or Henckels. What appeals to me about this particular knife is that the grooves cause the knife to act as a serrated knife. You can chop, slice, and dice anything easily and food will not stick to the side of the knife. To me, the "test" for a good knife, is how well it can chop juicy tomatoes, and I think this knife would score an A++.


One day, when I have the kitchen of my dreams, I will have an infinite amount of counter space that this handy dandy water boiling system will not be a cluttering agent. I admit, that I drink an exorbitant amount of tea. It is definitely a habit I have formed and I would love to have a pot of boiling water at my beckon call.


Perfect Portions

It is well known that the elements of a perfect cake (or any pastry for that matter) is the right amount of ingredients. It is for this precise reason that I am not a huge fan of baking. I am much more a spontaneous chef then a methodical one and having to measure this and count that drives me crazy. Most bakers will tell you that measuring cups and measuring spoons just don't cut it and, if you are seeking perfection, a scale is what you need. Well, this baby takes things to a whole other level. It not only a scale, its a dietitian and a nutritionist
too! This is perfect for anyone monitoring calories, sugar, or carbs and has a database of nearly 2000 foods.


Mr. Bento Stainless Steel Lunch Jar & Bento Lunch System

I am a teacher, and therefore never get to experience the joys of feeling like an actual professional and taking an hour lunch break out of the building. Creating an interesting lunch poses quite a challenge. (Sandwiches get boring really fast!) But than there is Mr. Bento to the rescue. With 4 different compartments that fit into the stainless steal vessel the combination of delectable lunch treats are endless. And the kids version would end the guilt I feel every morning as I pack lunch, snacks, you name it, into Ziploc bags!


Speaking of Japanese Bento boxes, check out these outrageous creations! That's not quite what I had in mind when I mentioned I needed to jazz up my lunch....but I could only imagine the commotion it would make in the teacher's lounge.


Floral Inspirations

We always have flowers in the house, and these minimal floral arrangements are exactly the look I am going for these days. I just love how organic the placement of the flowers are.

Hope you guys are enjoying the week! (Chef)uality will be back Friday with its usual webisode post! Cheers and happy eating!